- All
- Product Name
- Product Keyword
- Product Model
- Product Summary
- Product Description
- Multi Field Search


Views: 0 Author: Site Editor Publish Time: 2025-07-28 Origin: Site


Is your shower head outdated or underperforming? Replacing it can improve water flow and save energy. Upgrading your shower head brings benefits like water conservation and improved style.
In this post, we’ll walk you through the steps of installing a new shower head with ease.
Before starting, you need to decide what type of shower head will best suit your needs and bathroom style. There are several options available:
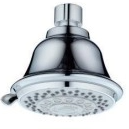
A fixed shower head is the most common option. It is mounted directly to the wall and provides a stationary stream of water. It is ideal for smaller bathrooms and those who prefer a simple, consistent flow of water.
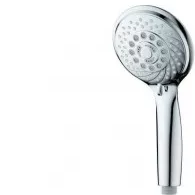
This type comes with a detachable hose that allows you to direct the water wherever you want. Handheld shower heads are perfect for flexibility, cleaning hard-to-reach places, and making bathing pets or children easier.

A rain shower head is installed overhead and mimics the feeling of rainfall. While stylish, it often requires special plumbing and might need professional installation. If you're upgrading to this type, be prepared for more involved work.
When choosing the right shower head, consider your bathroom's size and style. A fixed shower head might be best for a simple setup, while a rain shower head can be a luxurious upgrade for larger bathrooms.

Before starting any work, make sure to turn off the water supply to your shower. This is crucial to avoid any leaks or water damage while you're working.
The shut-off valve is typically located near your shower, but in some cases, it may be in your home's main water supply area. Turning off the water prevents accidents and makes the installation process safe.
Once the water is turned off, it’s time to remove your old shower head. Don’t worry; this is easier than it sounds.
Grab a crescent wrench or channel-lock pliers.
Wrap a rag around the shower head connection to avoid scratching the metal.
Secure the tool around the shower head, and turn it counterclockwise.
Keep turning until the shower head loosens completely. Be gentle to avoid damaging the shower arm.
Take your time and be careful not to apply too much force, which could cause damage to the plumbing.
Now that the old shower head is removed, it’s important to clean the shower arm fitting before installing the new one.
Cleaning is a simple step but crucial for a leak-free connection. Use an old toothbrush to scrub away any grime, old pipe tape, or mineral buildup. For stubborn residues, apply a mixture of vinegar and water to help loosen mineral deposits.
Once it’s cleaned, wipe it dry with a towel, ensuring that there’s no remaining debris that could affect the seal of the new shower head.
The next step is to apply thread-sealing tape to the shower arm. This prevents leaks and ensures a tight seal when you attach the new shower head.
Take a roll of Teflon tape and wrap it around the threads of the shower arm.
Make sure to wrap it in a clockwise direction, ensuring a tight and secure fit.
Apply about 3-4 wraps of tape, making sure the threads are fully covered.
Teflon tape helps prevent leaks by providing a water-tight seal, so this step is important for avoiding future issues.
Now that the shower arm is ready, it’s time to install the new shower head.
If you’re installing a fixed shower head, simply screw it onto the shower arm by hand.
Tighten the shower head gently, but don’t overtighten, as this could damage the threads or crack the shower head.
For handheld shower heads, screw the mount onto the shower arm and attach the flexible hose to both the mount and the handheld spout.
Make sure everything is aligned correctly and that the mount is securely in place.
If you're unsure, refer to the manufacturer’s instructions for specific details on your model.
With everything installed, the final step is to check for leaks. This is an essential part of the installation process.
Turn the water supply back on and check the shower head for any leaks.
Let the water run for a few moments to make sure everything is working properly.
If you notice a leak, carefully tighten the connection with a wrench, but don’t overdo it. Over-tightening can cause damage.
If the leak persists, you may need to remove the shower head, reapply Teflon tape, and reattach it.
Leaks are usually caused by a poor seal, so make sure that the tape is applied correctly and that the shower head is screwed on tightly.
Before you get started, make sure you have all the necessary tools. Some are essential for the job, while others are optional but can make things easier.
New Shower Head
Choose the type of shower head you want to install. This is the focal point of your upgrade.
Shower Arm
If you need to replace the shower arm along with the shower head, make sure you have a new one ready. It connects the shower head to the plumbing.
Escutcheon
This small metal part fits over the shower arm and covers the hole in the wall. It helps seal the area and gives a polished look.
Teflon Thread-Sealing Tape
Essential for creating a tight seal between the shower head and arm. The tape prevents leaks by ensuring the connection is water-tight.
Flashlight
A flashlight is useful if you’re working in dimly lit spaces, especially when installing the shower head or cleaning the shower arm.
Crescent Wrench or Channel Lock Pliers
These tools help loosen or tighten the shower head or arm. A crescent wrench can adjust to different sizes, making it versatile for your plumbing work.
Rag or Towel
A simple rag or towel will protect your fixtures from scratches while you work. It can also be used to wrap around tools to help loosen or tighten connections.
Liquid Remover for Silicone
If the old shower head had silicone sealant, a liquid remover can help break down stubborn residue.
Utility Razor
A utility razor can be handy for cutting through old tape or silicone without damaging the pipes or wall.
Small Brush (Old Toothbrush)
Use an old toothbrush to scrub away dirt, mineral buildup, or old tape on the shower arm. It’s small enough to reach tricky spots and clean thoroughly.
Choosing the right shower head is essential for both functionality and style. There are several types to consider, each offering different benefits.
Fixed shower heads are the most common type. They are mounted securely to the shower arm, providing a stationary flow of water.
How They Attach
Fixed heads screw directly onto the shower arm pipe, making installation straightforward. The connection is typically threaded, so it’s easy to replace or upgrade.
Fixed shower heads are ideal for those who prefer a consistent, steady water flow. They’re simple to use and maintain.
Handheld shower heads come with a flexible hose, allowing you to direct the water wherever you need it. This flexibility is perfect for cleaning or showering children and pets.
Benefits of Flexibility and Ease of Use
The handheld option lets you adjust the spray direction, making it versatile for different showering needs. It also provides easier cleaning, especially in tight spaces.
How to Install
Installing a handheld shower head requires attaching the handheld mount to the shower arm. Then, connect the flexible hose to both the mount and the shower head. Make sure everything is tightly secured to avoid leaks.
Rain shower heads are designed to mimic the sensation of standing in a gentle rainstorm. They are often installed overhead and can provide a luxurious showering experience.
Installation Requirements
Installing a rain shower head typically requires more plumbing work than other types. Because it hangs above, you may need to adjust the shower arm’s angle or install a ceiling-mounted arm. It’s important to ensure that your water pressure can handle the larger, softer flow.
Rain shower heads are best for spacious bathrooms and those looking for a spa-like experience.
Combination shower heads combine both fixed and handheld features in one unit. These systems offer flexibility, giving you the best of both worlds.
Ultimate Flexibility
You can switch between the fixed shower head and the handheld option depending on your needs. This type is great for versatility, offering a stationary flow for regular showers and a handheld option for targeted washing.
Even with careful installation, problems can arise. Here are common issues and how to fix them.
Leaks are a common issue after installing a shower head. If you notice water dripping, don't panic. There are simple solutions.
Teflon Tape Application Issues
If the Teflon tape wasn’t applied properly, the threads may not seal tightly, causing leaks. Try removing the shower head, reapplying the tape (wrap it in a clockwise direction), and reinstalling it.
Missing Rubber Washers
Rubber washers help form a tight seal. If the washer is missing or damaged, the connection may leak. Check for a washer in the shower head’s connection nut, and replace it if needed.
Another common problem is when the new shower head doesn’t fit the existing shower arm. This can happen if the sizes or threads don’t match.
Different Sizes and Threads of Shower Arms
Shower heads come in different sizes. Make sure the one you bought matches the size and thread type of your shower arm. Most shower arms use a standard ½-inch thread, but it's always good to double-check.
Solutions If the New Shower Head Doesn’t Fit
If the threads don’t match, you may need an adapter. These are available at most hardware stores and can help make your shower head compatible.
If your shower head feels loose after installation, it’s a sign that something isn’t tightened properly.
Tightening Connections Without Damaging the Threads
Use a crescent wrench or channel-lock pliers, but don’t over-tighten. Doing so can damage the threads, leading to further issues. Tighten the connection by hand first, and use the wrench to give it a small turn if needed. Always check to make sure it's snug but not too tight.
Installing a shower head is a simple process. First, gather your tools, choose the right shower head, and follow the steps carefully. Make sure to check for leaks and secure the connections properly.
Selecting the right shower head is crucial for both function and style.
With the right tools and confidence, you can easily complete this DIY project.
A: Yes, replacing a shower head is a simple DIY task. It requires basic tools like a wrench, Teflon tape, and a new shower head.
A: Shower heads typically last 5-10 years. Regular cleaning can extend their lifespan by preventing mineral buildup.
A: Absolutely! With the right tools and instructions, anyone can install a shower head without professional help.
A: Ensure proper Teflon tape application and check for a rubber washer to avoid leaks.